Interactive Data Import
The GAUSS Data Import window is an interactive environment for loading data from:
CSV and other text delimited files.
Excel files (XLS, XLSX).
GAUSS datasets (DAT, GDAT) and matrix files (FMT).
SAS, Stata and SPSS datasets.
as well as performing all aspects of data import, such as:
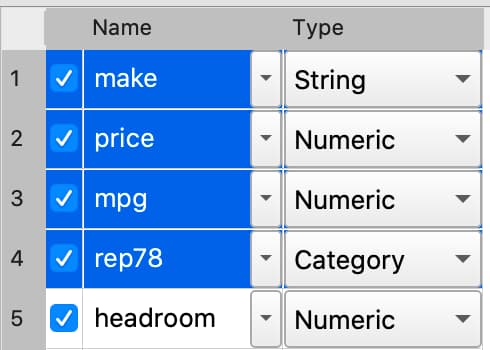
Selecting variables and changing their types.
Selecting observations by range or logical filtering.
Managing date formats and category labels.
Previewing data.
Open the Data Import window
You can open the Data Import window in three ways:
Select File > Import Data from the main GAUSS menu bar.
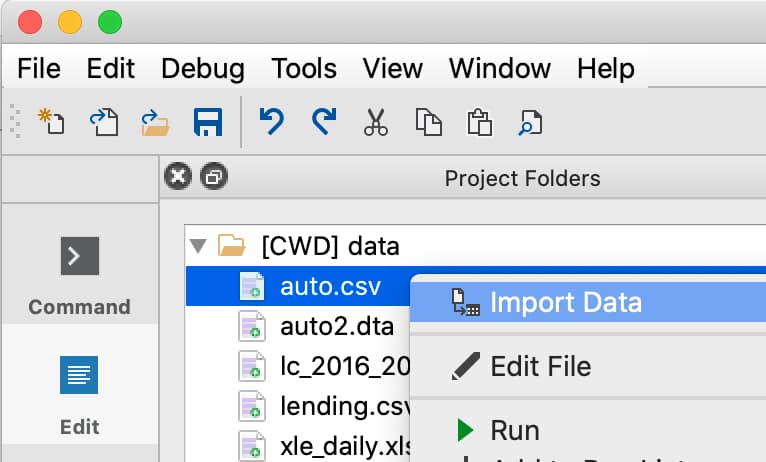
From the Project Folders window:
Double-click on the name of the data file.
Right-click the file and select Import Data.
Change the name of the matrix or dataframe that is imported
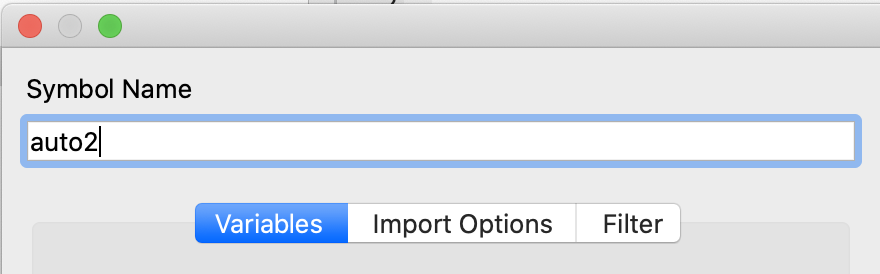
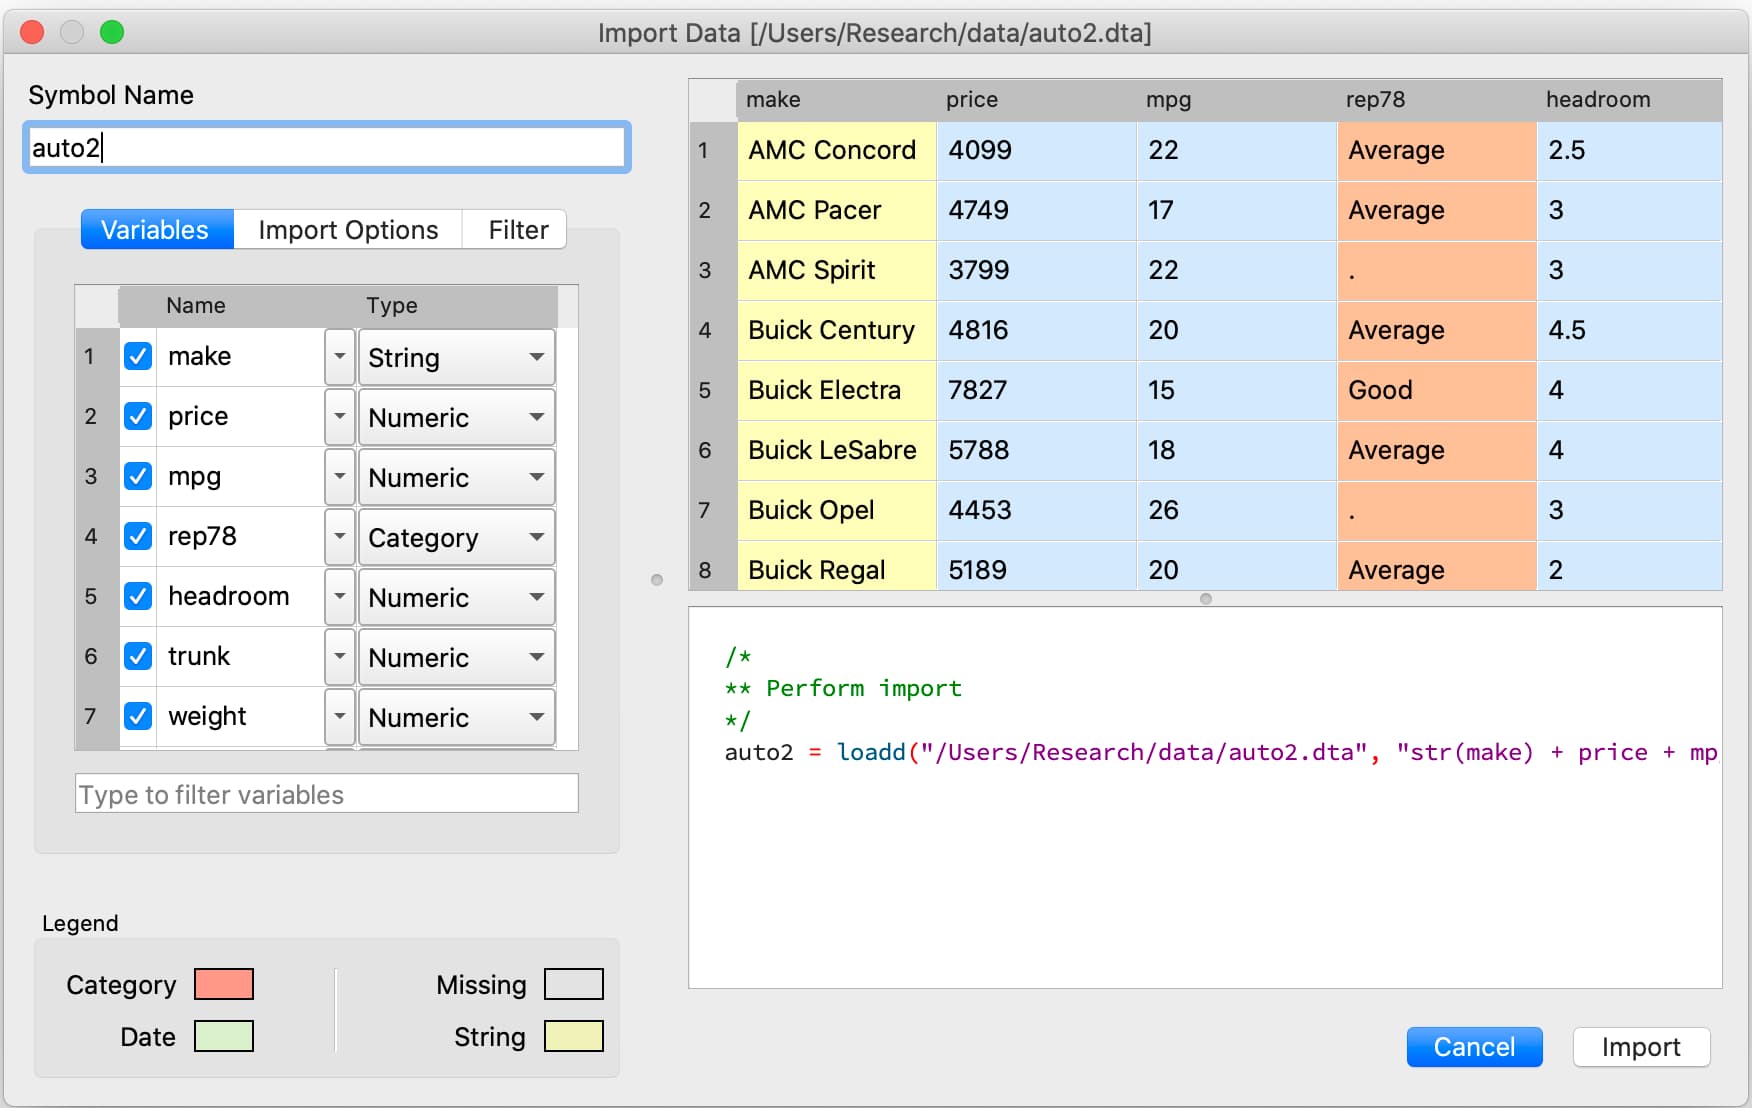
The Symbol Name text box in the Data Import window controls the name of the new matrix or dataframe that will be created. By default, this will be the name of the data file.
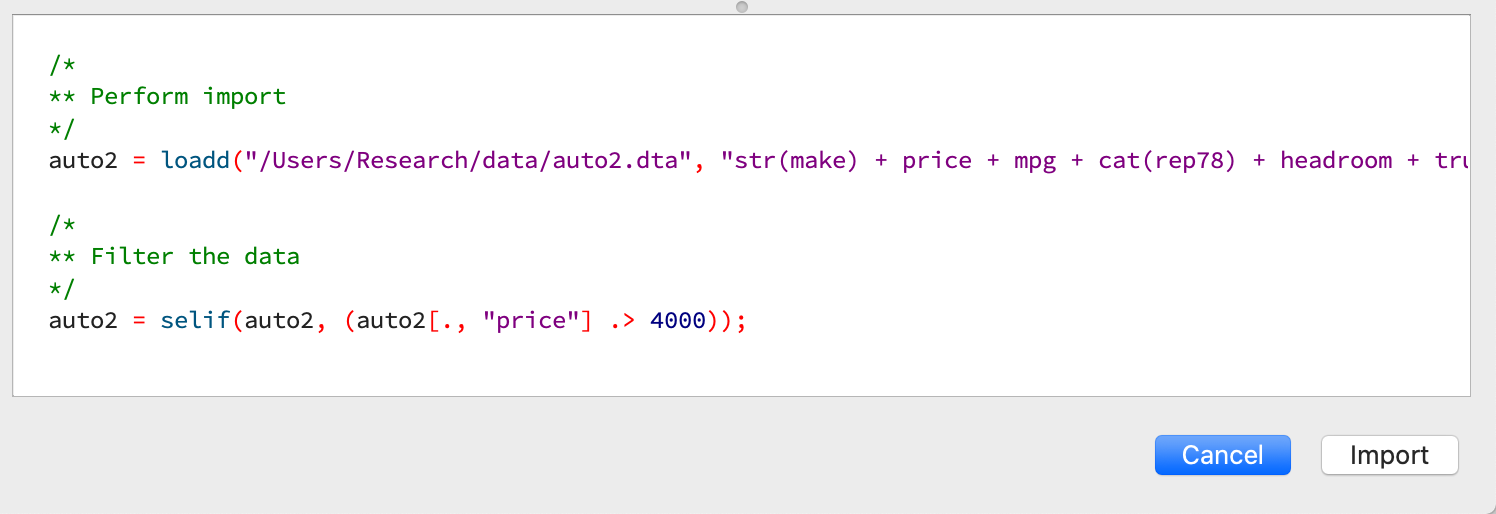
Autogenerated code to reproduce interactive import
The Data Import window auto-generates code to perform all the import and filter steps. This is the actual code that is run to import the data. Therefore, you can copy-and-paste this code from the Command History to a program file to repeat these steps.
Managing import options
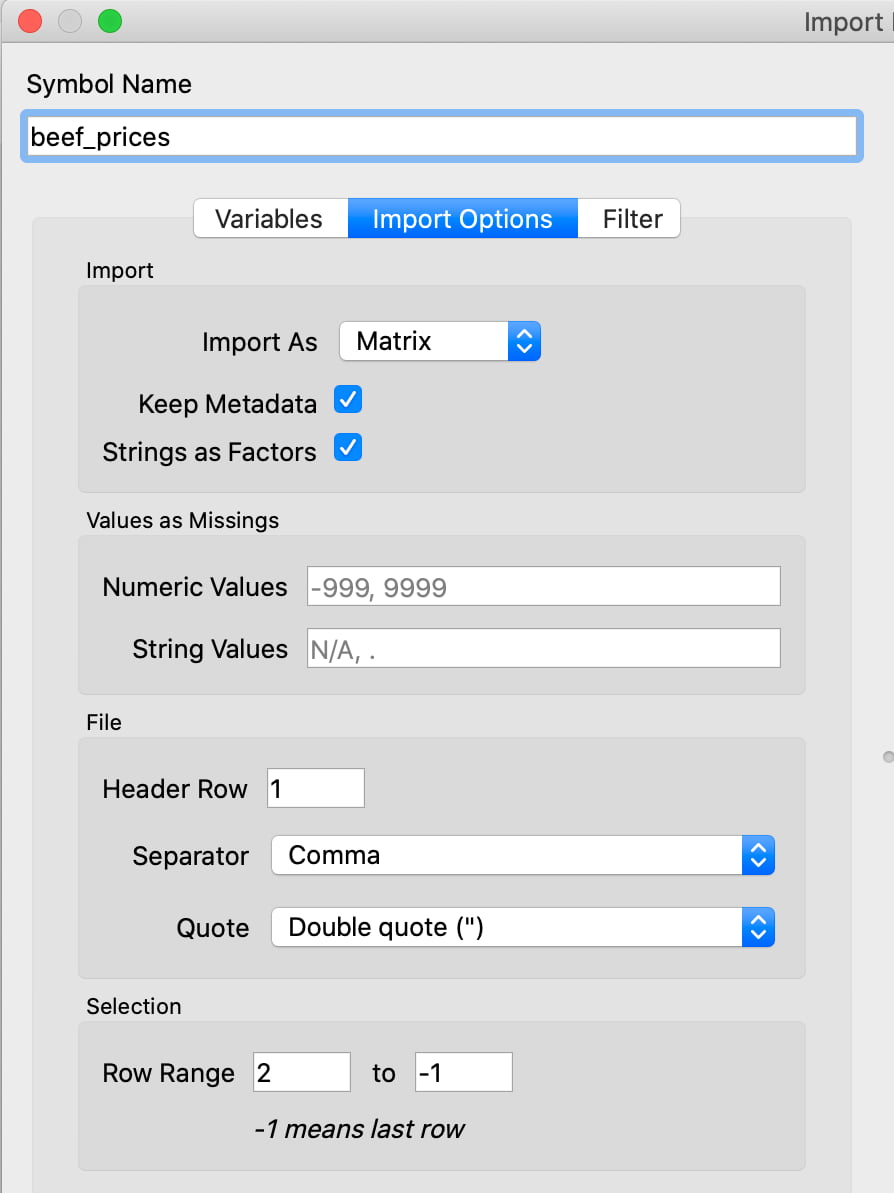
The Import Options tab lets you specify various aspects of data import, such as:
Import
Keep Metadata: If checked, the data will be imported as a dataframe with variable names and column type information (category, date, numeric, string). Otherwise the data will be imported as a matrix or string array.
Import As: This drop-down allows you to import the data as a string array instead of a matrix or dataframe.
Values as Missings
Numeric Values: A comma separated list of values that should be converted to missing values on import.
String Values: A comma separated list of strings that should be interpreted as missing values on import.
File
Header row: GAUSS automatically locates the most likely header row. To specify a different header row, enter the row number in the Header Row text box.
Sheets (Excel only) Selects which sheet to load data from.
Separator (CSV only) Select one of several common data delimiters from a list or set a custom delimiter.
Quote (CSV only) Sets the quote character to a single or double-quote.
Selection
Row range: Controls the rows of data to be imported. This should not include the variable names, if present.
Navigation and Data Preview
How to bring a variable in my dataset into view to preview
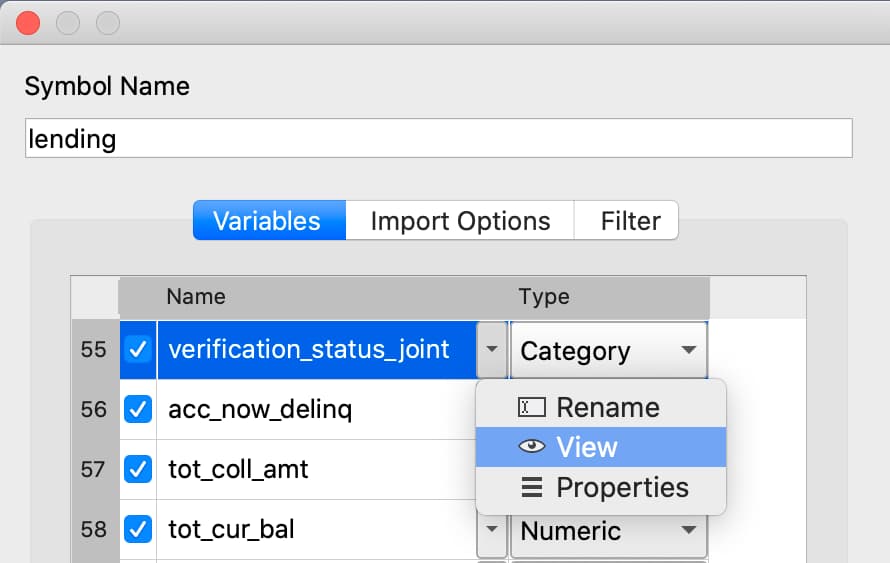
Click the button with the downward pointing triangle to the right of the variable you wish to bring into view.
Select View from the menu.
The preview window will shift to bring the selected variable into view. This is particularly useful for wide datasets with many variables.
Find specific variables in the Variables list
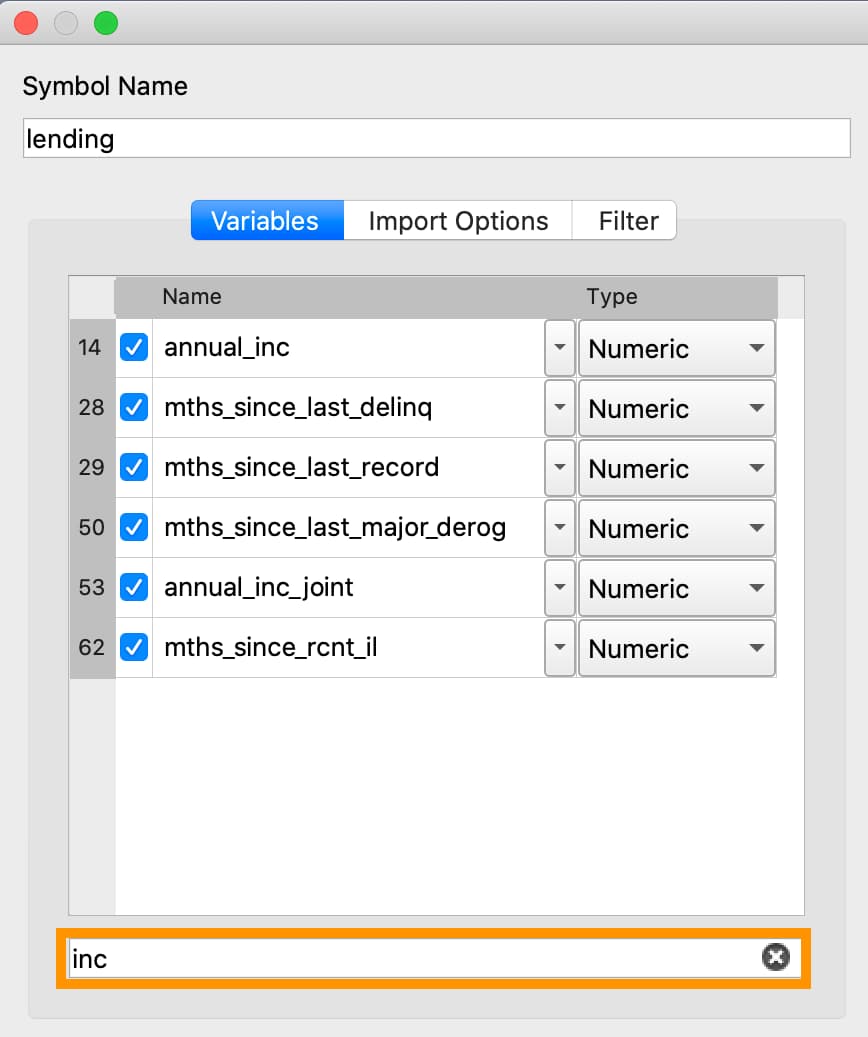
Type in the filter box below the Variables list to filter the variables by name or type. The Variables list will be dynamically updated with matches after each new character.
Note
You can filter the variables by type. For example, entering category in the filter text box will show all variables that are listed as categorical.
Select multiple variables
Click on the variable names while pressing the Control or Command key to select multiple variables that are not next to each other. Once selected, you can add, remove, or change their types all at once.
Select a group of variables
Click on the name of the first variable in the group. Press Shift and click on the name of the last variable in the group.
You may now perform actions on this entire group such as changing the variable types or selecting the variables for import.
Importing subsets of data
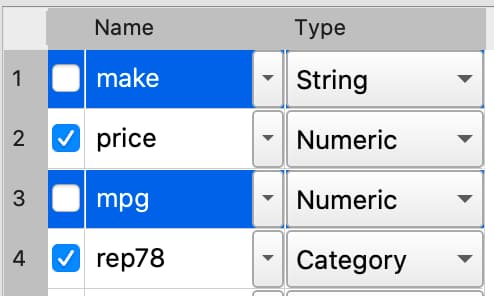
Select subsets of variables to import
Clear the checkbox to the left of the variable name on the Variables tab for any variables you do not want to load.
Control which rows are imported
The starting and ending row can be specified in the Row Range text box located in the File pane of the Import Options tab.
Note
By default, GAUSS assumes the starting row is the first row immediately after the header row.
Specify values to import as missing values
The Values as Missings section of the Import Options tab in the Data Import window allows you to enter a comma separated list of string or numeric values which should be imported as missing values.
Data Filtering
Filter observations to be imported
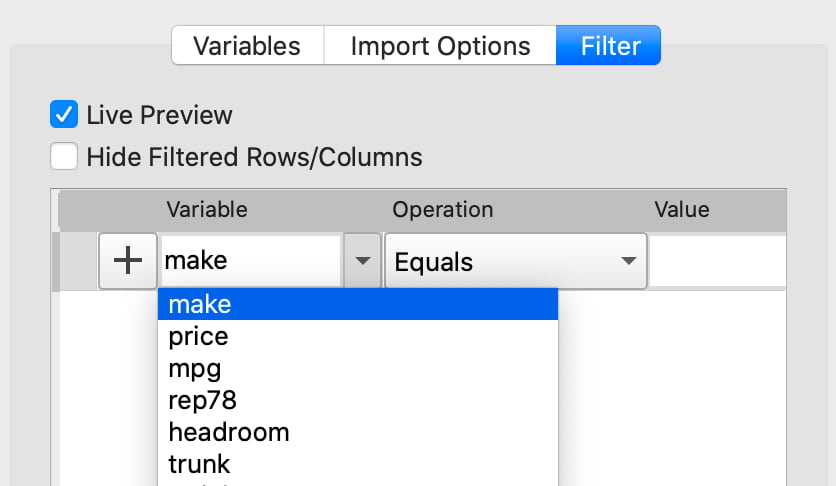
Use the Variable name drop-down list on the Filter tab to select a variable to use for filtering.
Select the desired filtering operation from the Operation drop-down list.
Enter the value for the filtering condition in the Value text box.
Click the
+button to add the filter.
Data type |
Filter options |
|---|---|
Numeric and Date |
|
= |
|
!= |
|
< |
|
<= |
|
> |
|
>= |
|
Is Missing |
|
Is Not Missing |
|
String and Category |
|
Equals |
|
Not Equals |
|
Contains |
|
Does not Contain |
|
Is Empty |
|
Is Not Empty |
|
Is Missing |
|
Is Not Missing |
Disable a filtering condition

Uncheck the checkbox to the left of the enacted filter to disable it.
Hide filtered observations from view
Check the Hide Filtered Rows/Columns option on the Filter tab to remove filtered observations from the preview.
Dates
Interactively import dates into GAUSS
The GAUSS Data Import window uses an internal smart date detector to automatically recognize data which represents dates and times.
If a date variable is not determined by GAUSS as a date, you can select Date from the Type drop-down list on the Variable tab. When a variable type is changed to Date, a Specify Date Format dialog automatically opens.
Specify a date format
If GAUSS does not automatically detect your date format, you will be asked to manually specify a date format using the Specify Date Format dialog.
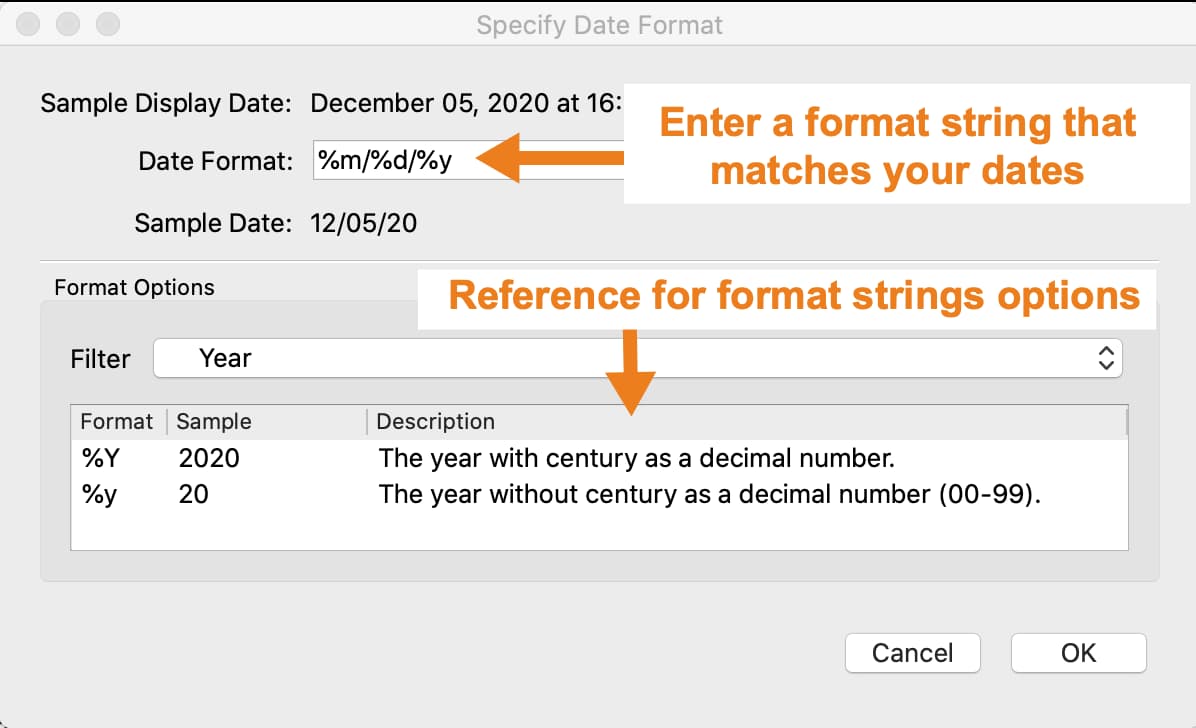
Build a format string in the Date Format box, using the BSD strftime specifiers, that represents your data.
If your data looked like this 03/12/2017, the correct format string would be %m/%d/%Y. The table below explains this.
Original Contents |
Description |
Type |
Format string contents |
|---|---|---|---|
03 |
A two digit month. |
Date |
|
/ |
A forward slash. |
Literal |
/ |
12 |
A two digit day. |
Date |
|
/ |
A forward slash. |
Literal |
/ |
2017 |
A four digit year. |
Date |
|
The Format Options section of this dialog contains the BSD strftime specifiers for reference. Use the Filter drop-down to filter the reference options shown.
String type
Change a variable to a string type
To specify a variable as a string, select String from the Type drop-down list on the Variables tab of the Data Import window.
When a variable is specified as a string type, it attaches string labels to underlying numeric variables. This allows you to view string labels when printing your matrix.
Category type
Specify a variable to be a category
To specify that a variable is a categorical variable, select Category from the Type drop-down list on the Variables tab of the Data Import window.
Change the category mapping
When you change a variable to a category, or select Properties from the drop-down to the right of the variable name, the Modify Column Mapping dialog will open.
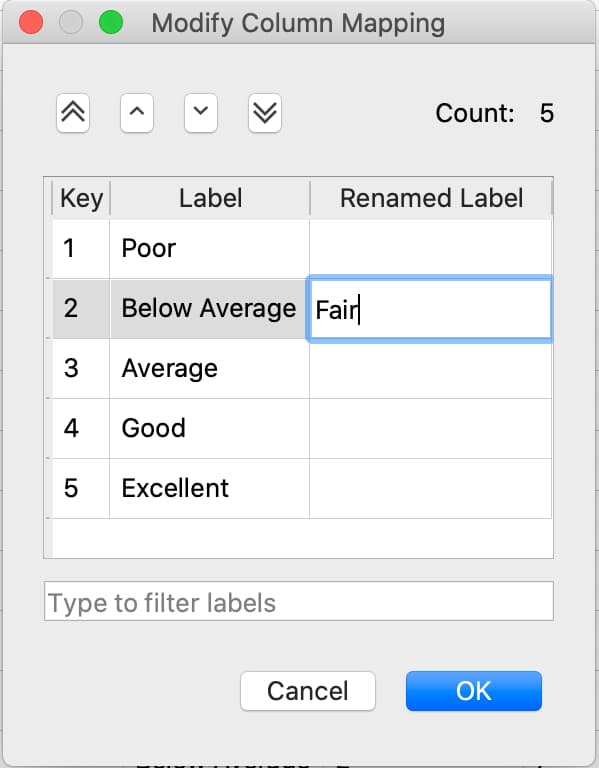
Rename a label by double-clicking in the appropriate row of the Renamed Label column and entering the new label.
Reorder a label by selecting the label and using the up and down arrows at the top of the dialog.
Specify the category to be the base case
The first label in the Column Mapping, mentioned in the previous section, will be the base case.
Count the number of categories in a categorical variable
The category Count will be shown at the top right of the Column Mapping dialog shown above.
Numeric type
Convert a variable to a numeric variable
To specify a variable as a numeric variable, select Numeric from the Type drop-down list on the Variables tab of the Data Import window.